Saddle photos of bad saddles with explanation, it’s not a witch hunt but is what I have had through my workshop over the last 25 years or so. There’s a disclaimer at the end of this article.
Right here goes, firstly remember every saddler is different and may or may not be trained in traditional saddlery.
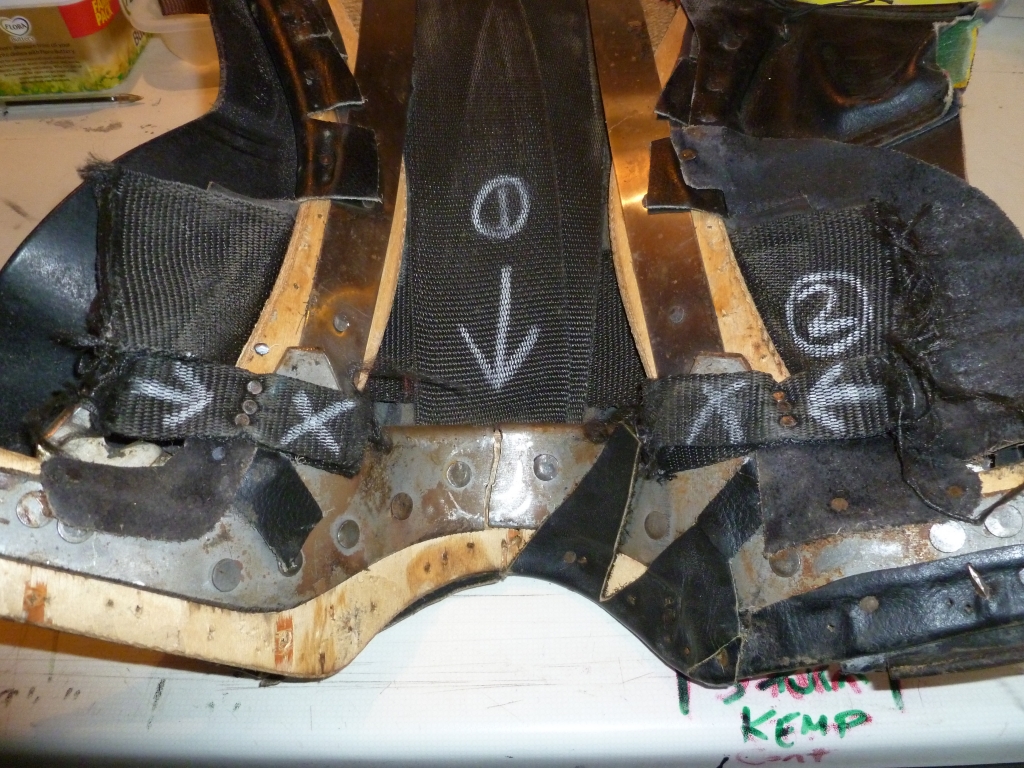
I will show you correctly made examples first. CLICK ON ANY PHOTOS FOR A LARGER IMAGE The first picture below (1) is a stripped down L & R saddle, old but good. Look at the number one written in chalk, that is the front girth strap webbing, in it’s traditionally correct place. It should preferably go over the tree and over the long webs of the seat , underneath that seat foam (white stuff) the web as number 1 in chalk would be sewn to the next wide girth webbing as well as through the long webs that run the entire length of the seat. That combined with the tacks you can see in the picture holding it down on to the tree makes for a very strong secure set up.
Fig 1 above
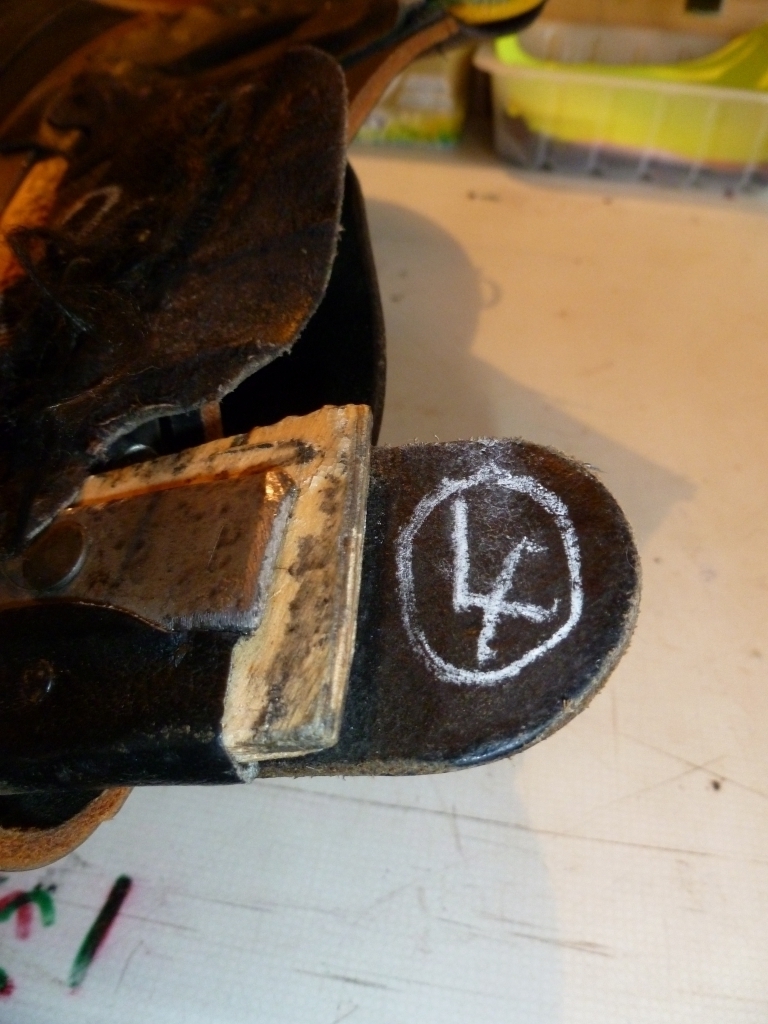
Fig 2 ABOVE - Close up of front girth web numbered 1 in picture written in chalk
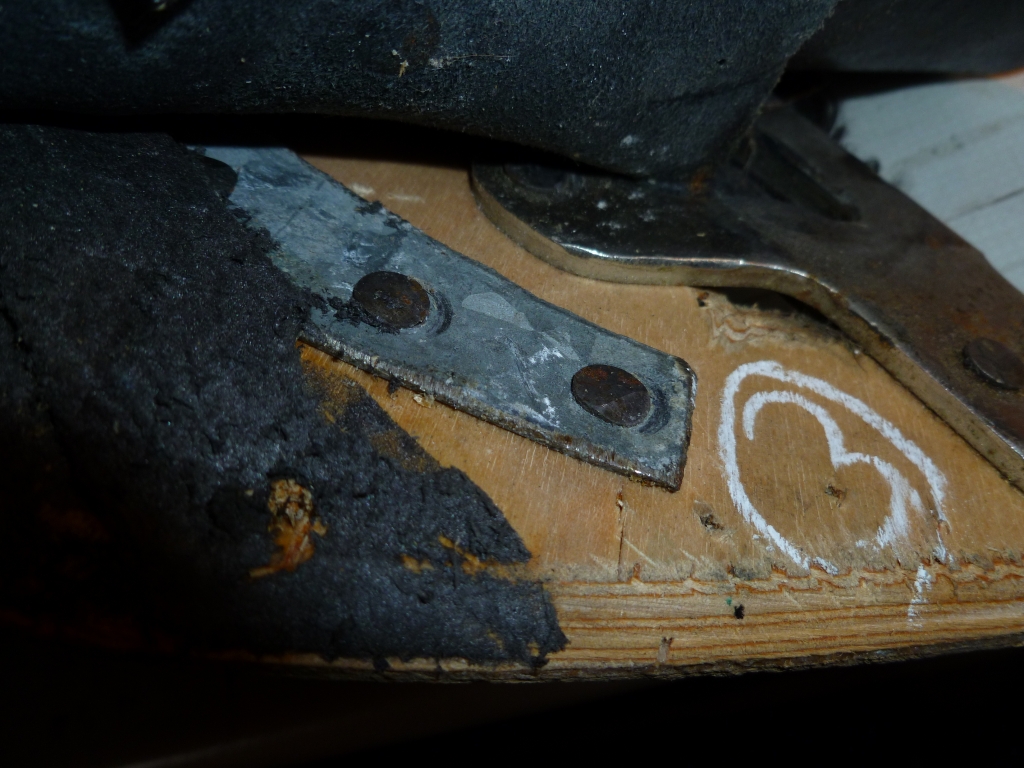
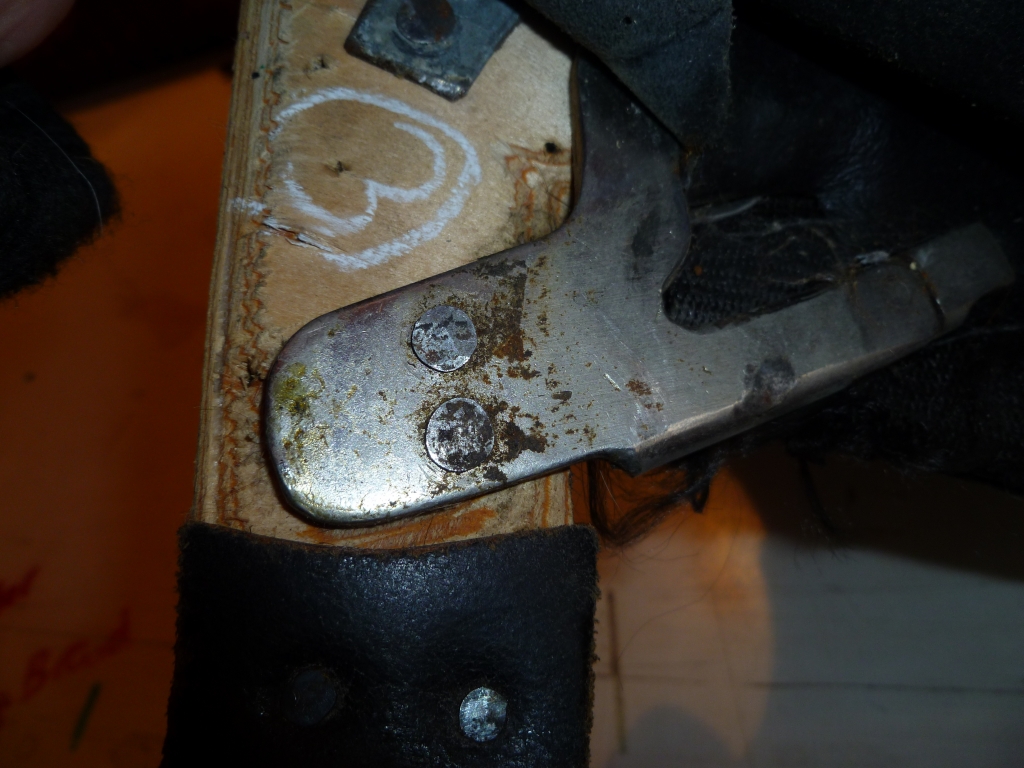
Fig 3 - Above This is the underside of the same saddle, see the laminated beechwood tree, it has springs running down the length of it, hence a spring tree so it has some give in it.A good tree will have at least 5 rivets across the head and gullet plates, as you can see in this pic,it has plenty in it’s gullet plate which is facing you! Number one written in chalk again shows you the front girth strap webbing I am holding, you can see that when the saddle is on the horse and girthed up with the girth straps that would be on this web that the downward force applied to the tree makes it secure and stays in the right place. Or that’s the theory!
Fig 4
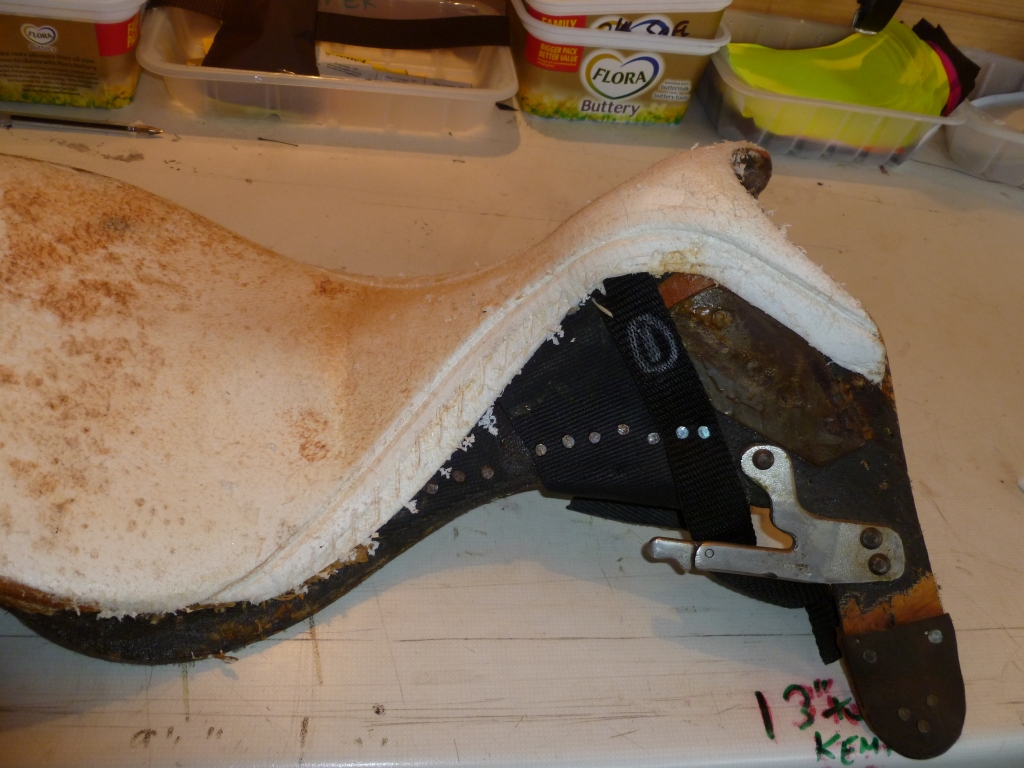
Now, fig 4 above is one of the monsters in my chamber of horrors,these are made near Walsall and people think they are "quality" I have 2 of these lurking in my workshop and they are by far the worst I have ever seen that was made in the UK, I have had dozens and I do mean dozens through here with broken trees, these are no exception.I have cut the flaps off as they are not needed and just get in the way.It is a little scruffy on the top but on the whole it looks ok from the outside, it has skirts that are hand sewn on to the seat which means time was taken (and you would assume care to detail) to make it.Machined on skirts are quicker and would have a row of stitches along the top of the skirt, mass production methods favour this type of work.
Fig 5 Above Same saddle turned upside down in fig 5 , first look at the softwood home made tree, HE’S BEEN UP THE DIY SHOP AGAIN! Secondly the result of having softwood trees instead of laminated hardwood can be seen at the end of the arrow, it points to the crack/break down the gullet plate, this is what happens to these saddles, every 10 I have looked at 7 have had broken trees.The gullet plate HAS got 5 rivets in it each side, which shows (usually) it is a good saddle tree and it is if it is professionally made by saddle tree makers, however you can buy these plates from our saddlery raw material suppliers and rivet them on yourself which is what this saddler has done.Now look at the number 2 written in chalk, this is the front girth web!! Merely held on to the tree by 3 ribbed nails, cut off webbing just nailed on, instead of going over the tree and the long webs of the seat as I have explained earlier on, sewn to the other webs and nailed on top of the tree as in the first pics I showed you, could this saddle get any worse! I have looked recently , there’s a few of these for sale on ebay, described and “quality English made saddles”! Well, make your own mind up on that one!
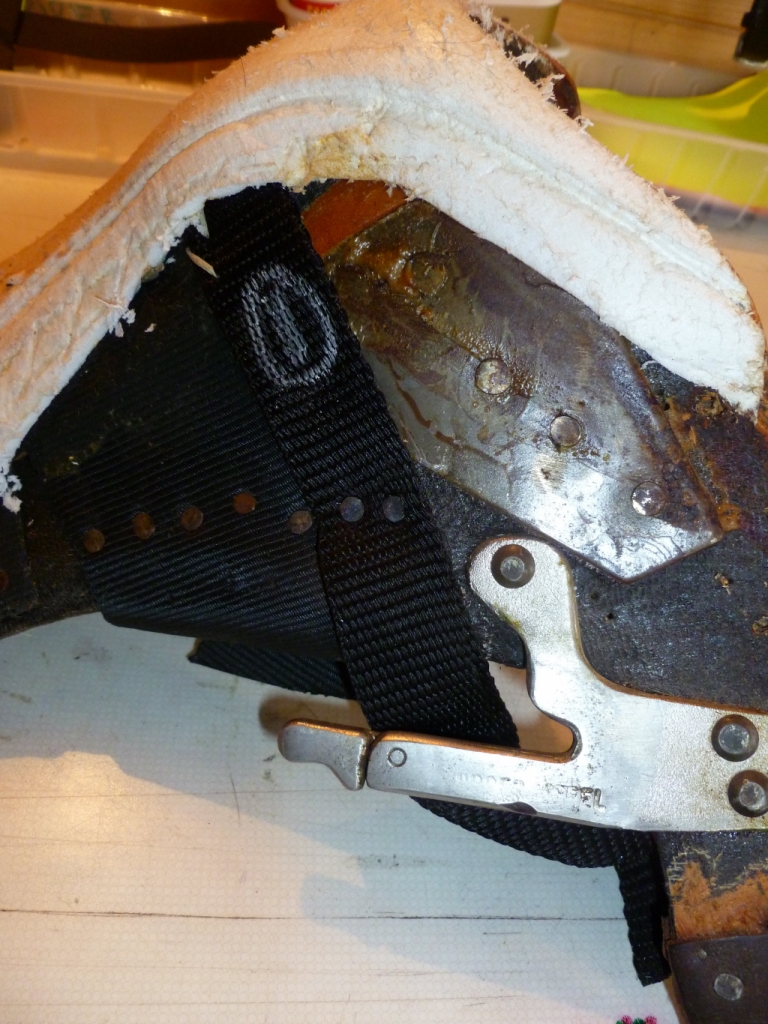
Fig 6 Above Close up of those nails, nailed into a softwood tree! That’s all that’s holding your front girth straps on! 5 foot jump anyone on one of these?
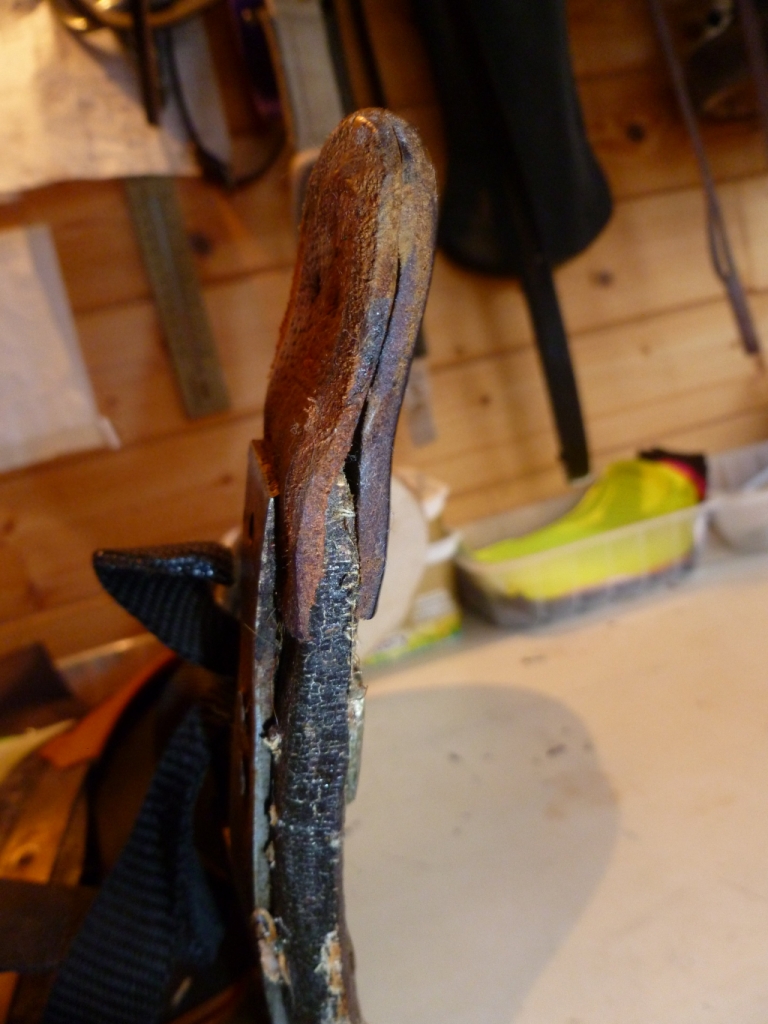
Fig 7 Above- Incorrectly made flexible points as in Fig 7. It is a close up of the points of that homemade tree, he has just added a piece of leather to the outside when in fact to make flexible points you should sandwich those points with 2 pieces of leather as in fig 8 below it.They way he’s done it means that the ends of those points will dig in to the panel and apply pressure down onto the horse's back if the panel isn't flocked sufficiently, hence why we make flexible points in the first place, to spread the load as well as to help keep the two halves of the saddle together and make it more comfy for the horse.
Fig 8 Above- Correctly made flexible points
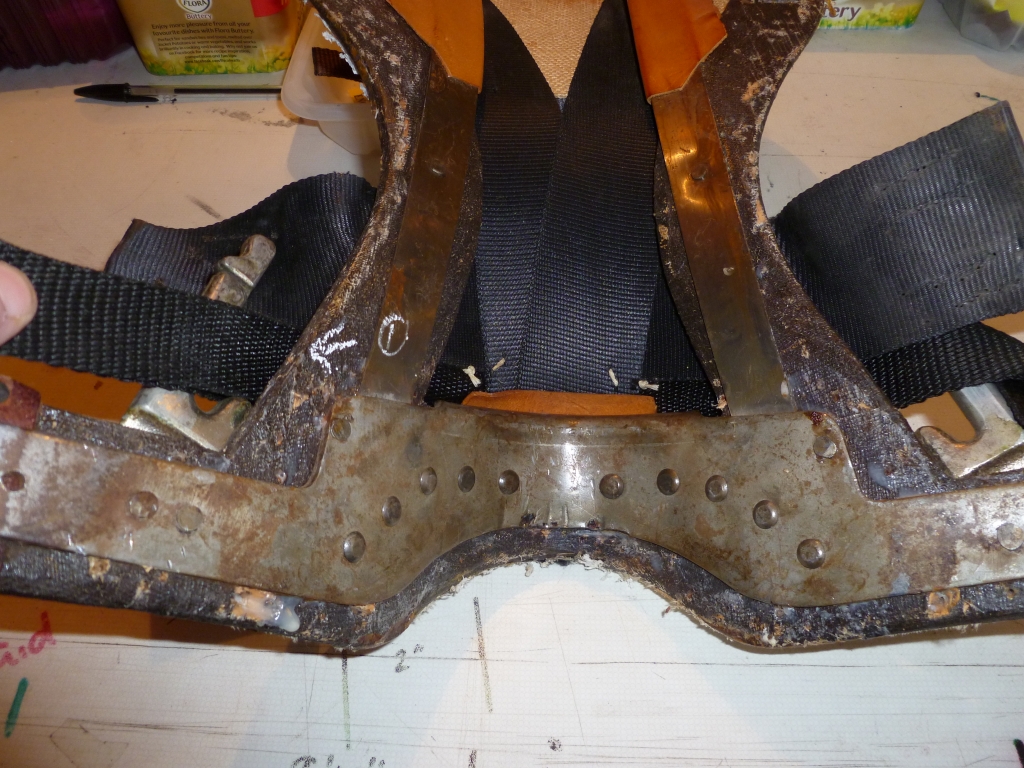
Fig 9 Above Fig 9 is of the same saddle showing the home made steel “headplate” which is a bit too thin and has rough edges and good view of that soft plywood tree again.
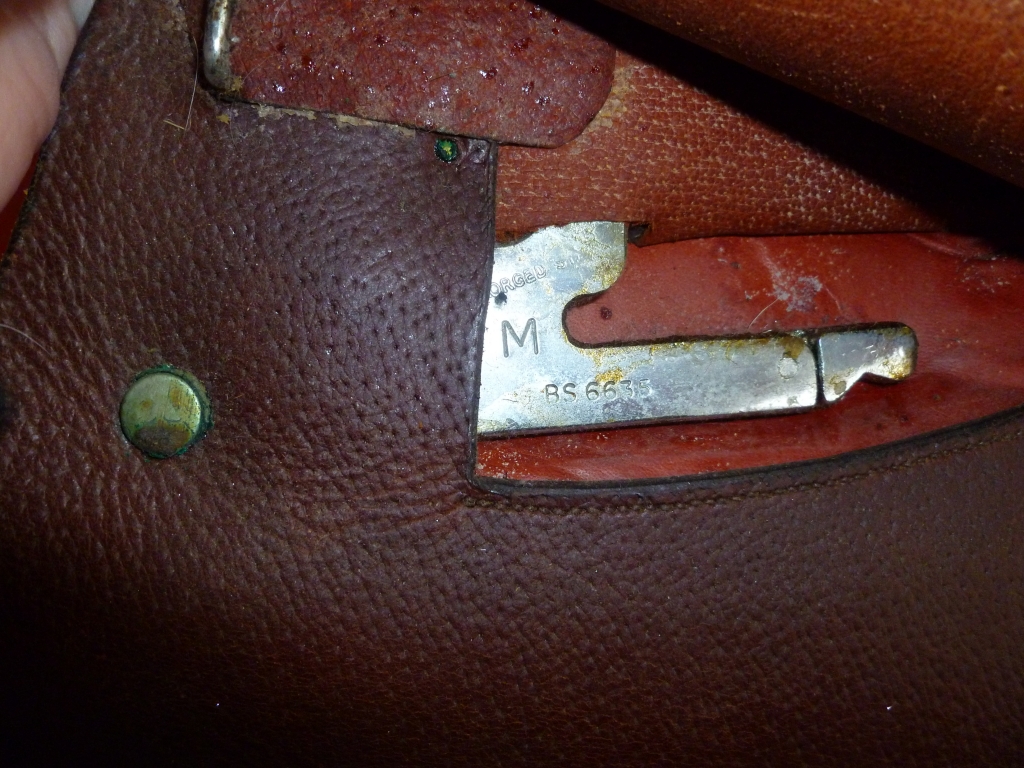
Fig 10 Above Last one of this saddle is fig 10 and surprise surprise it shows the stirrup bars and NO BS number or even stamped forged steel, I don’t know where he would have got these from, perhaps he made those too? They are better than the riveted ones on Indian saddles though!
Fig 11 Above Fig 11 is of a saddle I hand made back in 1987, even then they has BS safety numbers stamped on the bars, so there’s no excuse as to be using unstamped bars.
On to a different Saddle now.
Fig 12 Above This saddle in fig 12 is a very well known Walsall make, again note the lack of stitches showing on the top of the skirts, it’s been hand sewn showing care to detail on the outside.It came to me with 2-3 breaks in the tree, can’t remember how many exactly, the horse had rolled on it, it was an insurance job, I had to strip it down diagnose what was wrong and give a quote for repairs.
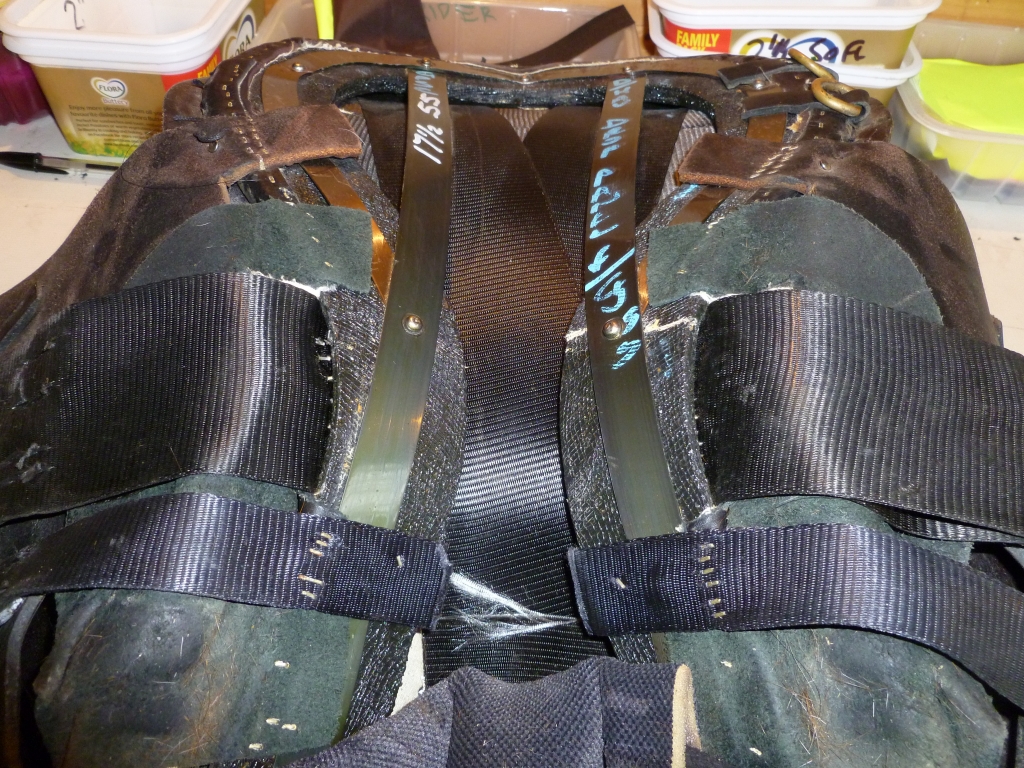
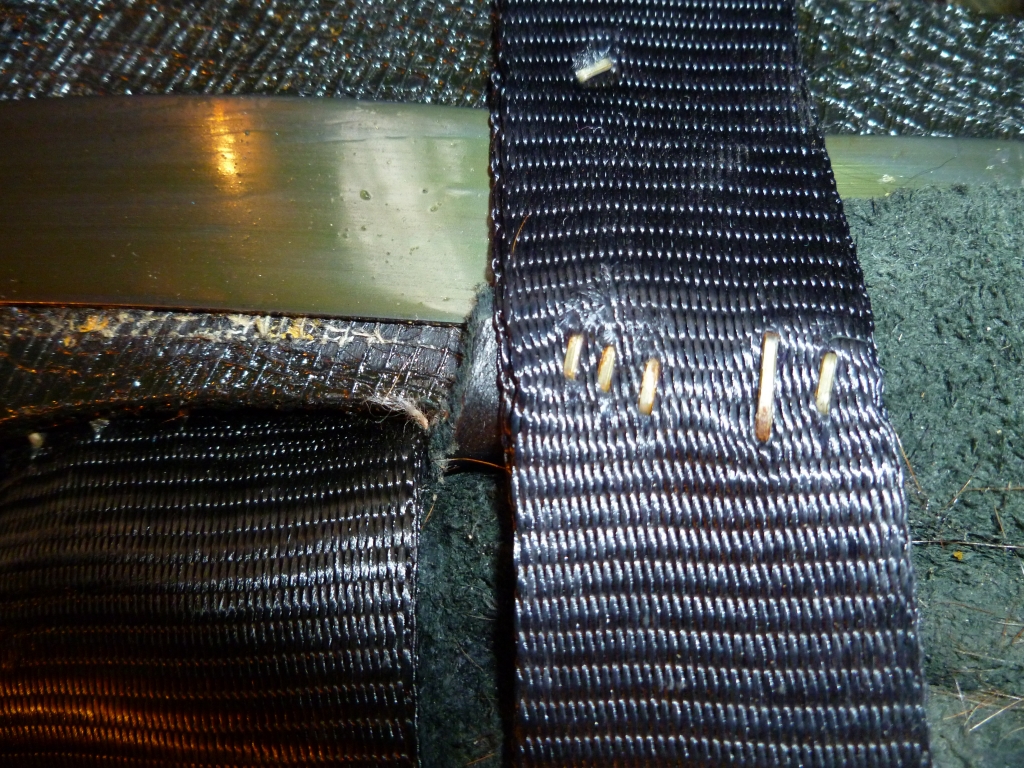
Fig 13 Above Ok, remember that last saddle at the beginning of this thread , the home made tree one with the short front webbing straps that the girth straps stitch on to? Well have a look at this one in fig 13 , it shows the same very bad practice of using short pieces of webbing tacked on under the tree, in fact it’s only held in place by a few staples! It is not only frowned upon in the trade to make saddles like this it is false economy, the amount of webbing and time you save by doing this short cut is nominal and really not worth the risk of being sued if the saddle were to part company from the horse.To be fair, it would take a lot to pull the rear wide girth strap webbing off as well, but if any of the girth strap stitches on the rear webbing are unsound then this could be a distinct possibility, so why risk it, I certainly never would.
Fig 14-Above Close up of staples, the long staple is the actual length of all of them, the reason the others look shorter is because they have already frayed the webbing and are pulling through it, this was a new saddle, only a few months old when it came to me. Take it down the line a few years, how safe would these straps be after they have had more usage, would they pull right through the webbing and render the saddle unusable until repairs had been performed on it? Makes you wonder. These saddles new now are in the region of £1,200-£1400 depending on where you shop. Disclaimer, all the above information is fact, the saddles are my own property and not customer’s saddles. The photos are my own property, the companies involved may now be making the saddles in the established and correct way. I have not publically named any of these companies making these sort of saddles. May 2013 |

| Visitor Counter: | |||||||
 |  |  |  | | | ||