Demonstration on badly made girths
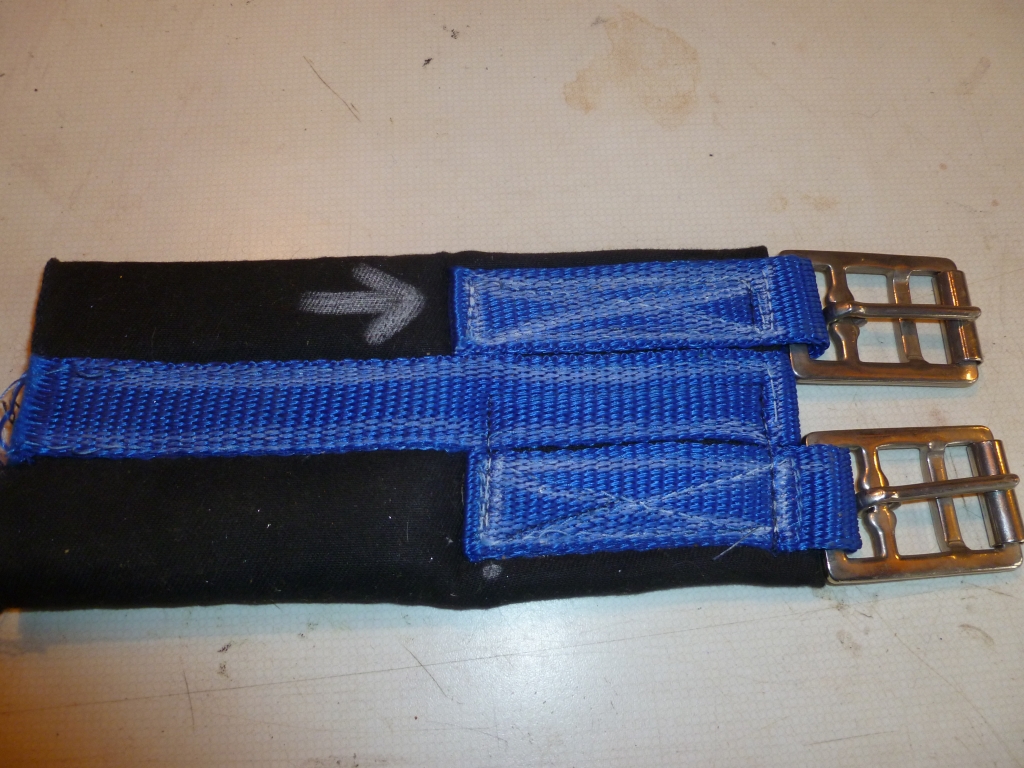
The best made saddle when on your trusty steed can only be as safe as the girth that is holding it on. I was taught the following method of making girths and it is basic traditional saddlery training and can be applied to all saddlery that requires a chape. A chape is a piece of either leather, nylon or synthetic material that’s used to go round a fitting (a buckle as on the girth) and is then attached to the main body of the girth via stitches, which can be hand stitched or machined. In the photo below, the white chalk arrow is pointing to a chape.
Fig 1-Above
I’m using a cotton girth for this demonstration, fig 1 is the end chopped off of one of my own design of girth. I saw what was on the market and wasn’t happy with the variety and style I could buy in from my saddlery wholesalers. I don’t make these now as I have decommissioned the old treadle 45k singer sewing machine that I made them on. But may make them again oneday if I buy a new machine.
The girth’s body material is cotton summer sheet, allowing me to make some lovely colour combinations! I made the girth wider then normal by ½” this offers a greater bearing surface and less pressure on the horse’s sternum.
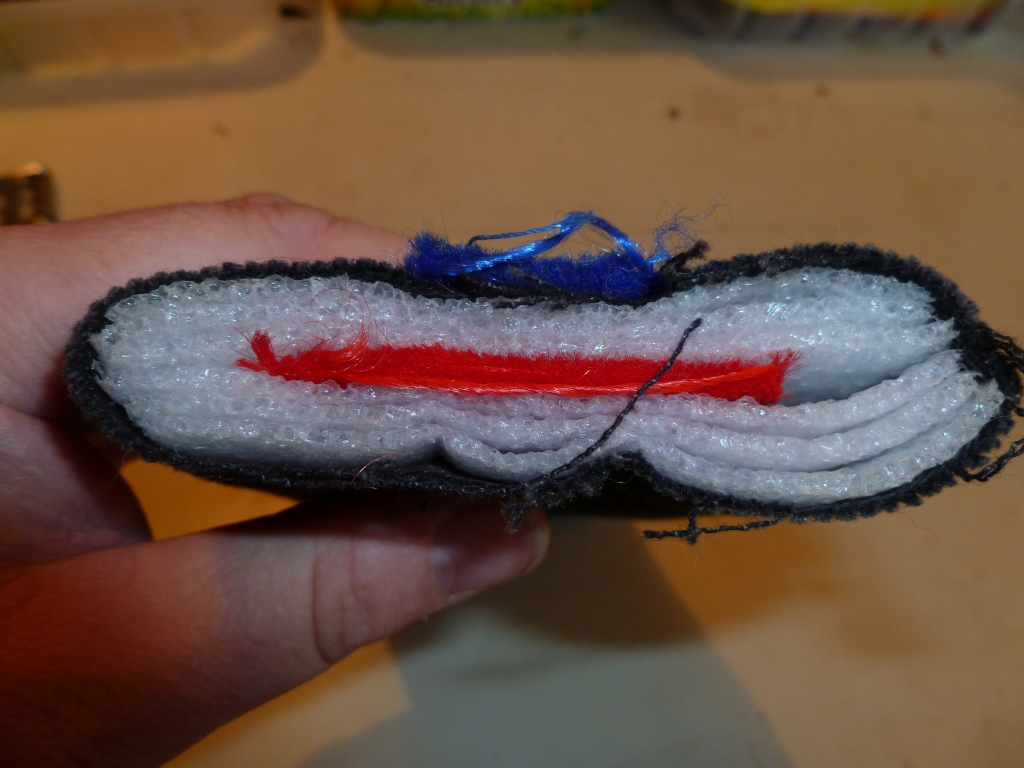
Fig 2-Above
In fig 2 I have shown you the inside, which is multi layered foam, very well padded (5/8” thick), it is very malleable and moulds well to the horse’s contours making it very comfy for the horse. That’s the comfort, now the strength needs to be addressed as cotton summer sheet and foam are not designed to be subjected to a great deal of force are they?
I have added a piece of 2” polyester webbing internally (it's the red middle in fig 2) it’s down the entire length of the girth. This not only makes it very strong but stops it stretching too. Then I have what’s known as a lay platform running down the length of the girth externally (1" webbing), you also get this on commercially made girths and is normal for girth manufacture. It’s the long blue strap running down the length of the girth. At either end of the girth we have 2 chapes, the pieces of polyester webbing that go round the buckles and attach onto the girth body (the arrow in chalk in Fig 1 is pointing to a chape). I doubled the thickness of these chapes, so if one thickness of webbing was to fray and break, there was a second piece as back up to hold the buckle on. All the chapes, lay platform and internal 2” webbing are sewn together to make the collective strength but not only that, do you notice that the chapes are pushed right on to the girth as in Fig 1, right up as far as I can get them to that arrow in chalk? This is VERY important as it has a greater bearing surface and it makes it SO much stronger and is how they should be made. In Fig 1, I have highlighted the stitches with white chalk so you can see exactly how many stitches are holding all that together. The buckles are made in England. Thread is nylon bonded.
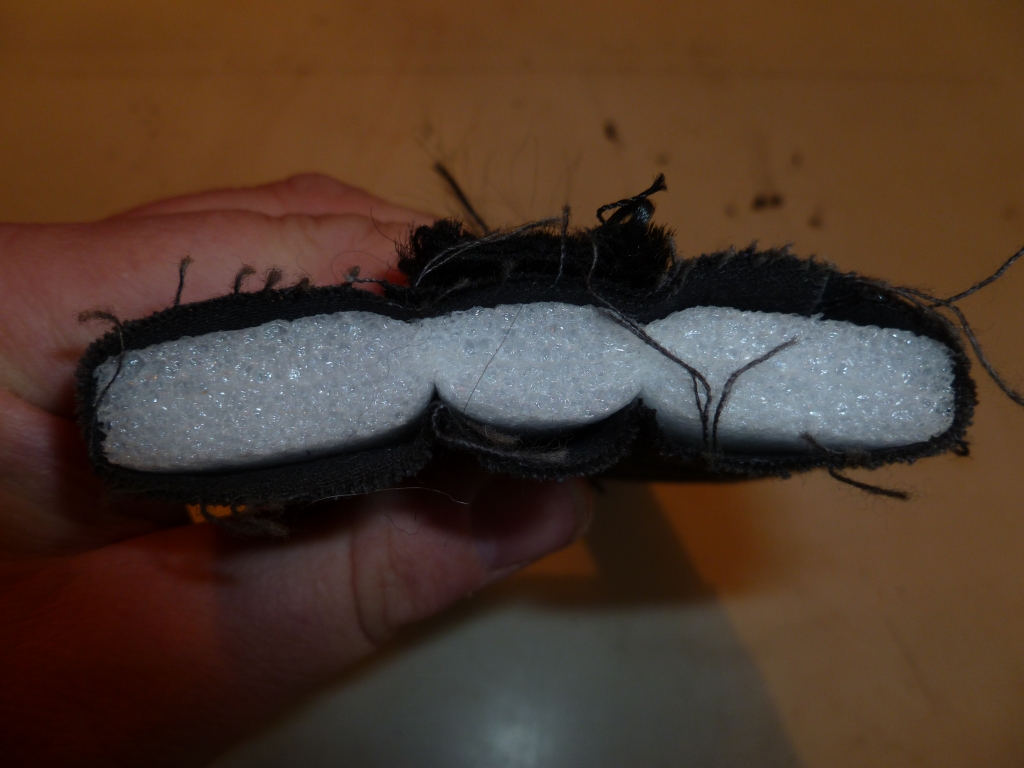
Fig 3-Above NOW! Remembering what I have shown you about girth construction, look at fig 3. Fig 3, is a cheap cotton girth bought from one of my saddlery wholesalers. Do you notice the chapes and how little of them are actually ON the body of the girth? Again I’ve highlighted the stitches with white chalk. Not a lot of stitches holding it on are there? You’d think this might not be too bad if it had that internal 2” wide piece of webbing to make it stronger, wouldn't you?
Fig 4 - Above
In fig 4 it shows you the internal view, no webbing, only foam. It has the lay platform (long black webbing strip down the length of the girth) but it’s the stitching at each end that is the weak point. These girths are on sale everywhere. All girths no matter what the style, if they have a chape to hold the buckles on and no matter what they are made of, should have buckles sewn on like in Fig 1 for strength.
Which one would you prefer to use?
|

| Visitor Counter: | |||||||
 |  |  |  | |  | ||